Category: sustainability
-
Join in our summer of retrofit DIY and improve your home
A series of free and low cost workshops in South London to help you improve your home and reduce costs.
-

Case Study: Whole-House Retrofit in Lewisham
Project Overview: Transforming a London Home for Net-Zero This project is located in an Edwardian residential area built between 1907 and 1911 on the site of the former Belmont villa in Lewisham, South London. The project aimed to improve energy efficiency and air quality through a deep energy retrofit. The homeowner wanted to tackle climate…
-

Annie and Will make their home more energy efficient
Annie and Will contacted me at Ecoalex because they wanted to make their house in Wimbledon, South East London warmer and more energy efficient. They have a realistic budget for the project but want to make the most of it and prioritise the projects that save the most carbon and fit with the renovation plans…
-

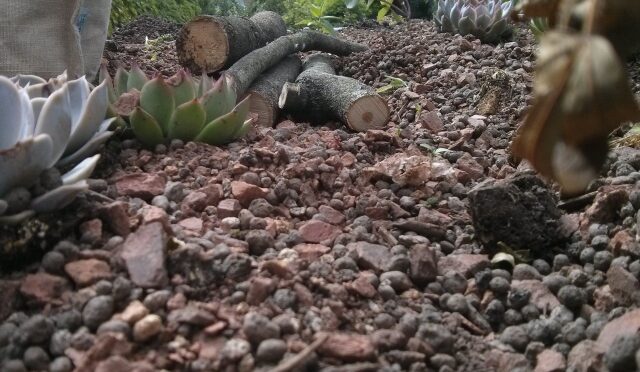
Building a green roof in South London
New green roof in South London with gabion cages for the sides, insulation and biodiverse planting.
-
‘Spectacular’ green roof in Dulwich
I built this one last week on a garden office in Dulwich. I don’t do so many sedum roofs but this did come up looking really nice and is instantly green. The roof build up was using the Optigreen lightweight roof system. A protection fleece over the waterproofing, drainage layer, lightweight substrate and pregrown sedum…
-
East dulwich green roof
This was a green roof on a new extension built from reclaimed bricks. The roof had a slope on it meaning we used a different drainage system that also helped retain the soil in place. It also had a watering system added at the top of the slope for the dryer months.
-
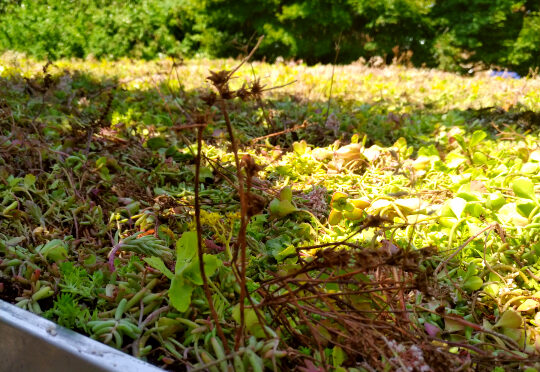
Hackney retrofit green roof
This was a really cool extension using reclaimed materials in Hackney. The green roof was a bit tricky to photograph but you can see the effect of the plants blowing in the wind above the skylight.
-

Green roof on a bike shed
This is a project I completed back in October, secure cycle storage and a green roof. The client wanted secure storage in the front garden without having a big ugly box taking up all the space for planting and we came up with this elegant solution. As the shed is on the way into the…
-

My Shabbihaus eco retrofit project part 2 Boiler replacement
This came about through problems with the old boiler rather than careful planning. Firstly I replaced the thermostat with a Smart controller, this was about 5 years ago and the choice was limited but I got an Owl controller which allowed us to control the heating with a smart phone. This allowed us to monitor…
-

My Shabbihaus eco retrofit project – part 1 introduction
Intro to my home retrofit project